Junk Art: Egg tray suitcase
Posted on February 21, 2004

One project outline for an art class I attended read:
Suitcase Project: Find a suitcase (any size) or it can be a typewriter case or any other case with handles etc. You are to alter/transform/change/perform with/document/whatever you want, it’s up to you. It’s your idea. Create an environment inside/outside do something strange/silly/unusual/new/great/stupid/OK.
Ideas began to pour through. While sorting through my trash, one idea caught on – to convert egg trays I collected for another project into a suitcase. I decided to paint each side of the egg tray wells in different colours. I thought it was worth exploring what was possible when one applies a chaotic combination of colours onto an organized pattern.
Construction
To stick the egg trays to form panels of the suitcase, I used common craft glue. To follow the “recycled” theme, I stuck the trays onto cardboards cut from soda can boxes.
 Two suitcase panels made out of egg trays stuck together using recycled materials
Two days later, the two sides of a suitcase was ready.
Painting
Painting was a much more time-consuming phase.
The decision to use yellow, red, blue, green, black and blue was more technical in nature than aesthetic. Since I needed large quantities of paint that maintains colour consistency over a few days, I decided not to use mixed colours.
While the general rule of painting is to paint dark colours over light, painting an egg tray was slightly more complicated. I had to paint hard-to-reach areas, such as the spaces between wells, before painting other areas.
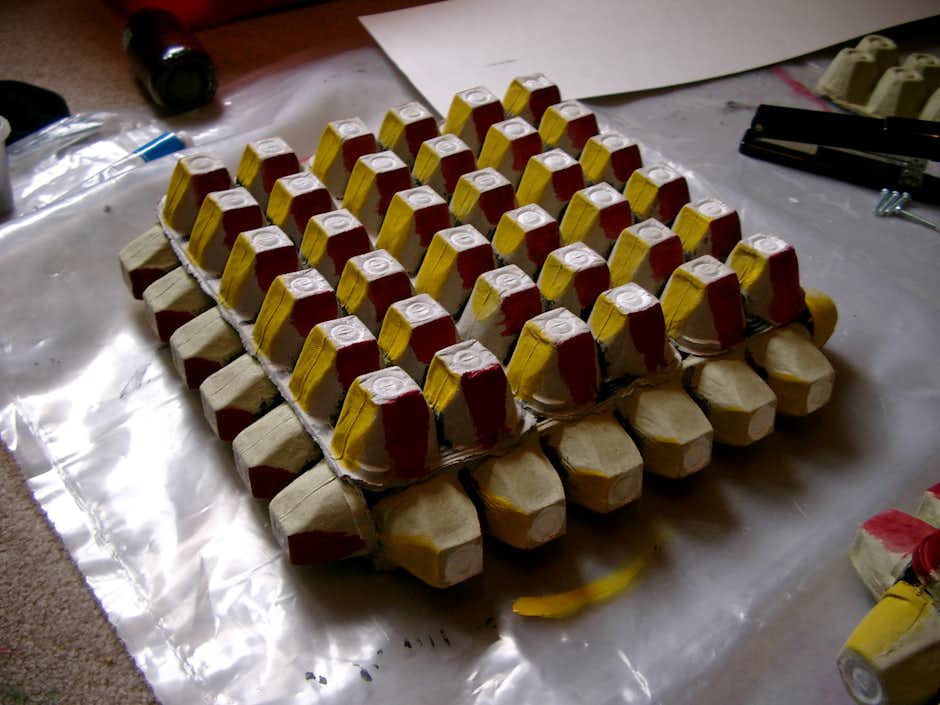
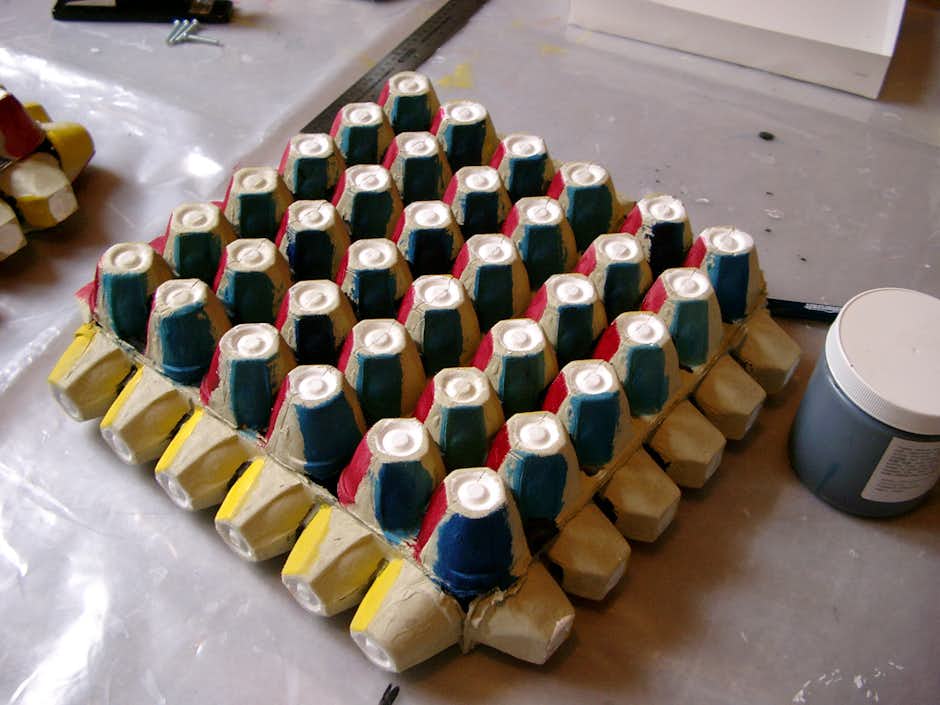 The colouring process followed a regimented sequence to minimize missed areas
I began with one formula: paint the tough parts (black), then white, yellow, red, blue, green, and finally black again. I also needed a painting sequence to make sure that I did not miss any of the 126 individual wells.
I painted the inside first (so I don’t smear paint when my hands try to reach the insides). That did not work – I missed a few cells. So I went from top to bottom. Even then, I missed one blue side. I painted that side with black.
52 long hours of breathing in acrylic fumes later, I had two sides painted.
Assembly
To allow the case to open on hinges, I planned to tape hinges onto the bottom of the panels. After browsing a local hardware store for nuts and bolts, I went for proper metal hinges instead.
 Two hinges hold the suitcase panels together, allowing them to open freely. Bolts hold the hinges onto the egg trays
I bolted them to the egg tray, which I found insufficient because the pressure on the hinge may tear itself out of the paper egg trays. I strengthened the hinges’ hold on the panels by pouring plaster into egg tray wells that the hinges bolted onto. Because the plaster takes the shape of the threads of the bolt, it became a large and cheap nut.
 An egg tray stacks over the top part of the suitcase, creating a lock. Bolts hold the "lock" in place. The plastic strap anchored on the "lock" forms the handle
The final item in the list was to create the handle. After all, a suitcase wouldn’t be complete if it’s not portable. I played around the suitcase for a while and liked the idea of stacking the egg trays. I decided to make a pair of egg trays to be the “lock” of the suitcase.
What about the handle? I thought of using plaster again to create the handle out of a mould. However, plaster is not tough enough and the mold was too hard to make. Besides, fresh plaster is not “recycled”.
I went looking around my house and found a plastic packaging strap. I stabbed short segments of an old bike spoke through the bottom of one of the “locks”, creating a bridge for the strap to hang on. I put the straps around the spokes, bent it, then taped them together.
After 7 days…
The tray was complete, and exhibited in a show-and-tell presentation in class. While I can’t figure out a practical use for a suitcase like this, perhaps one day someone will.
In the meantime, it’s destined to go back to where it came from: trash.