Erie Loop - The Gear
Posted on May 17, 2005
Preparing for the cycling trip involved nothing more than a simple list made on Notepad and nights of excitement looking forward to the trip, keeping me awake. There was going to be a self-sufficient mobile home, a video production center, a photography lab all in a small world I bring with nothing more than the muscles below my torso.
The tight budget I had made it all the more interesting. $300 tents, gas stoves and other camping luxuries were ruled out in favour of $10 alternatives and the lovely merchandise from the local dollar store. There was no cargo space in front. I had to make do with two relatively small panniers in the back
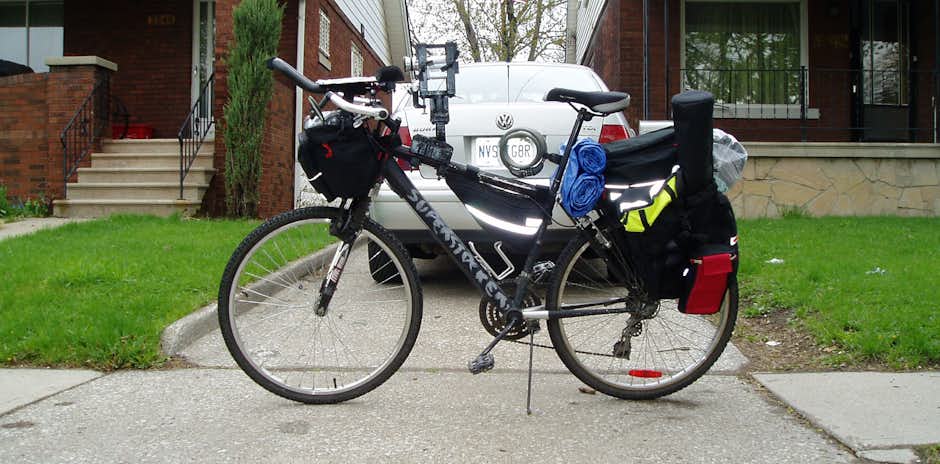
The Bike
I bought the bike from a department store for about $140. Targeting the average family who have their kids rolling around only in the summer meant that these bikes were never built for serious riding. I had since changed the rear brakes, chain and shifters when they broke. The bike was otherwise pretty rideable.
I switch out the saddle for a more comfortable one. I also added an aerobar for comfort in long distance. I switched out the 2.125” tyres for a set of 1.75”. They were faster and more comfortable, due to smoother thread.
Although I had clipless shoes and pedals, I couldn’t install the pedals on the crank because the crank's thread size was non-standard. No luck finding adaptors either.
 Map mounted onto the aerobar of the bike for easy directions
For touring, I added rear panniers and rear rack-top compartment. For the front, I hung a handlebar bag under the aerobar. I also built a waterproof map holder on top of the aerobar so I can frequently check my directions.
The bike didn’t fair well on the trip. After long periods of cycling in the rain, the rear brakes’ tuning screws were stuck. I was cycling with brakes on for about 70 km. The wheels were a problem, too. They rusted durng winter and the spokes became stiff. I tried truing the rear wheel but ended up snapping a spoke instead.
I changed the rear wheel when I stopped in Niagara Falls. I also disabled the rear brakes and depended only on the front brakes. The chain snapped the day after I finished the trip. The front shifters couldn’t engage into the big chainring anymore.
Camping Gear & Garment
During my bike trip last summer, I slept pretty well with my sleeping bag, even though temperatures dipped to 10 or so degrees Celsius. So I thought with heavy garments, I can simply sleep in the same sleeping bag with no problems. I was wrong. I couldn’t sleep much and always woke up when the temperatures were really cold, usually at about 4am.
To protect myself against rain, I used a tarp tent. It is actually a tarp hung over a half-extended tripod for some breathing room. It did very well keeping moisture out, but also did extremely well holding moisture in. I would have thought that the opening near the legs would keep the inside ventilated and dry, but that was a wrong assumption. I stopped using the tarp as a tent and instead used it as a sleeping mat.
For the garment, starting from the top: a helmet, a pair of sunglasses, three nylon shirts, one rain jacket, one sweater, two pairs of cycling shorts, one pair of normal shorts, a pair of wool socks and a pair of normal sandals. It was far too cold at night to sleep in summer shorts, so I bought a pair of trousers during the trip.
I had two pairs of gloves – one intermediate, which from my experience worked from 8°C to 16°C, and summer gloves which I use at higher temperatures. The intermediate ones were heavily used. During rain I covered my gloves and socks with plastic bags to prevent moisture from soaking in.
Tools
I brought only what I knew how to use. With the tools I brought, I could fix flats, repair broken chains and replace snapped cables. I could also true a wheel. I didn’t know how to deal with cranks and freewheels, so I didn’t have tools for them.
The tools I brought, among others, were:
 Allen keys and wrench
 Hand pump
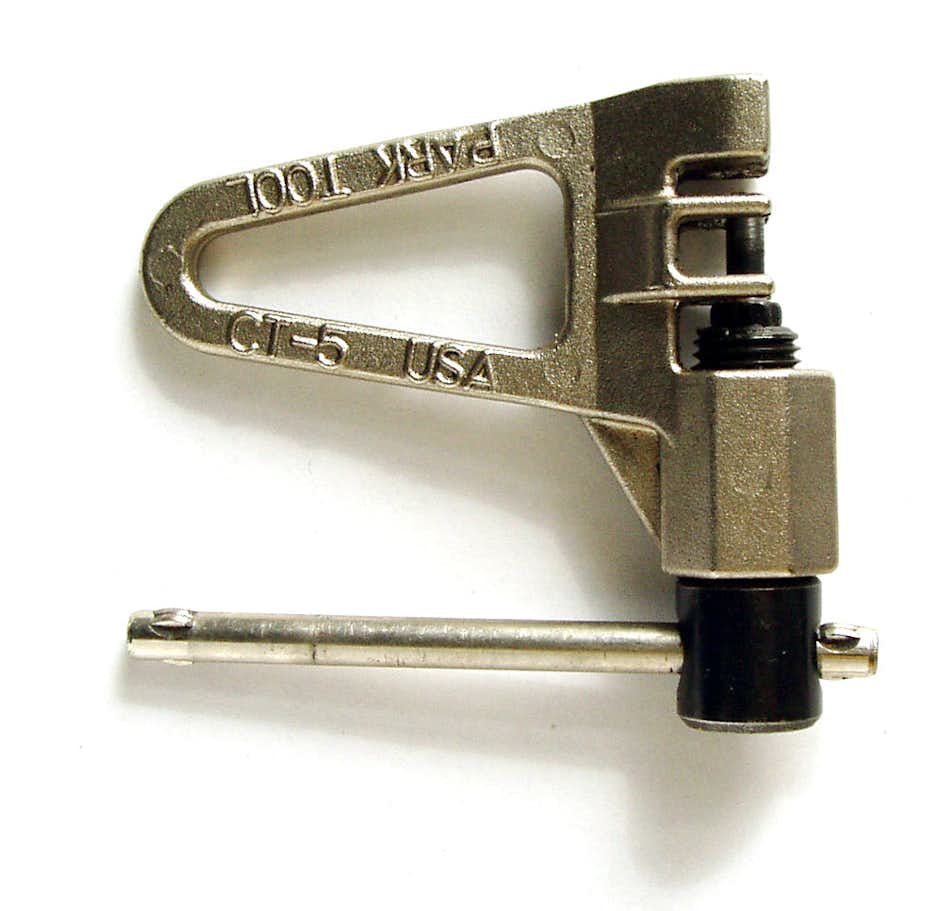 Chain tool. Technically, a rivet extractor
Cameras & Accessories
For still photos, I used a cheap yet durable Olympus mju 300 (Stylus Digital 300) 3.2 Megapixel camera. It wass water resistant, and with double shells it was cold and shock resistant as well.
It was a workhorse. I left it out in the rain and cold and took pictures while it was still pouring. Its only caveat was its use of xD cards. Although smaller, xD cards are also more expensive and less widely used. There were multi-format readers in libraries that could read CompactFlash, MMC and SD cards, but not xDs.
However, bringing a USB cable solved the problem. I have two 128MB and one 16MB cards, giving me room for about 360 exposures. They weren’t quite enough to hold all that I wanted to shoot. I had to frequently hunt for libraries and Internet cafés to unload pictures. I considered using a 1GB card but prices for xD cards of that size were unaffordable.
I had an extra battery I bought for $2 but after five recharges, it wouldn’t charge anymore. Lesson learned: No batteries from eBay.
The video camera I used was a Panasonic PV-GS200. It’s an NTSC MiniDV camcorder without progressive scan mode. It had three CCDs, capturing brilliant colours. I used a 0.42x wide angle lens, a polarizer and a UV filter. The first two were used extensively. I also brought a 46mm to 37mm lens adapter so I could use the filters without the wide angle lens, but I ended up simply zooming through the wide angle lens most of the time.
The video camera was mounted on my bike using the camera mount I made.
 Left to right: UV filter, Polarizer, 46mm – 37mm adapter
 Left: ClamperPod. Right: 0.42x wide angle lens
I brought eight blank MiniDV videotapes with me on this trip. I managed to use seven. I carried an extra battery, which together with the battery that came with the camera gave me a about 6 hours of shooting time. I never needed to use up half of any of the batteries before getting the opportunity to recharge, but it was nice to know that the camera will always has battery power.